How to Launch Your First Google Ads Campaign
Did your first Google Ads campaign leave you unsure which settings actually mattered?
For UA teams, launching on Google often turns into a guessing game. Too many options, too many campaign types, and pressure to “get results fast” push you to overbuild from day one. One wrong goal, one bloated setup, or one early optimization can stall learning, confuse Google’s algorithm, and burn budget before you get a single usable insight.
This blog shows you how to launch your first Google Ads UA campaign using a minimum viable campaign setup, so you can learn faster, protect your budget, and build a foundation that helps you scale user acquisition with confidence.
What Is Minimum Viable Campaign Setup?
A Minimum Viable Campaign Setup is the simplest Google Ads setup that gives the algorithm enough data to learn without wasting budget. For user acquisition teams, it means launching with fewer campaigns, clear goals, clean tracking, and enough creatives to cover Google’s inventory.
Instead of trying to optimize everything from day one, you focus on stable delivery and learning first, so you can make smarter scaling decisions later with real data.
Once you understand what a Minimum Viable Campaign Setup is, the next question is why it matters so much for your first Google Ads UA campaign.
Also Read: How Marketers Use Google Ads Transparency for Creative Wins
Why a Minimum Viable Campaign Setup Matters for Google Ads?
Your first Google Ads UA campaign usually fails because Google doesn’t get enough clear data, time, or signals to learn who your ideal users are. Overbuilt setups, early optimizations, and weak tracking confuse the algorithm and slow learning. A Minimum Viable Campaign Setup solves this by keeping your launch simple, stable, and focused on learning first.
Here are the key reasons a Minimum Viable Campaign Setup works: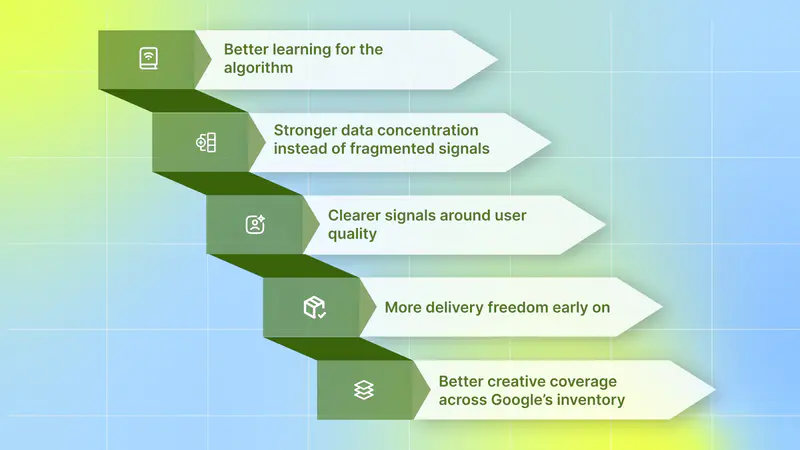
Better learning for the algorithm: Making bid, budget, or goal changes in the first few days resets Google’s learning process. A minimum setup reduces the urge to intervene early and allows performance to stabilize before decisions are made.
Stronger data concentration instead of fragmented signals: Splitting spend across too many campaigns, ad groups, or geos starves Google of the data it needs. A minimum setup keeps the structure lean, so learning happens faster and with stronger signals.
Clearer signals around user quality: When early funnel or value-based events are missing, Google can’t identify high-quality users. A minimum setup prioritizes clean, reliable conversion signals before scaling.
More delivery freedom early on: Strict efficiency targets or heavy exclusions restrict exploration and slow performance discovery. A minimum setup provides the algorithm with enough flexibility to identify who converts.
Better creative coverage across Google’s inventory: Launching with too few formats or assets narrows reach across Google’s placements. A minimum setup ensures enough creative variety to support learning across Search, YouTube, and Display.
Now, let’s look at how to launch your first Google Ads UA campaign.
How to Launch Your First Google Ads UA Campaign
Launching your first Google Ads UA campaign should prioritize simplicity, stability, and data over early optimization. Here are the core steps to follow when launching your first Google Ads UA campaign:
Log in to Your Google Ads Account: Start by logging in to your Google Ads account.
Add Your Business Information: Start by adding your business name and website. If you have them, link your existing Google accounts for faster campaign setup and get tailored recommendations along the way.
Select Your Campaign Goal: Choose your primary conversion goal, like driving sales, generating new leads, or building brand awareness.
Create Your Ads: Add your campaign assets and preview your keywords, images, logos, and videos in different ad formats. Google’s AI will then find the best-performing ad combinations to multiply campaign results for your goal.
Choose Your Audience and Budget: Tell the audience you’d like to target. Google will use it as a starting point to recommend keywords and expand your reach. Get budget recommendations that work for you.
Finalize Settings and Launch: Confirm billing details and review your setup. If you’re optimizing for installs, purchases, or subscriptions, make sure conversion tracking is live before launching. Once confirmed, publish your campaign and let learning begin.
Now, Google enters a learning phase where early inputs matter more than any setting you chose at launch.
What Google Ads Needs in the First 14 Days
While launching your first UA campaign, your goal in the first 14 days is not to optimize or chase efficiency. Your goal is to give Google clean data, creative variety, and enough stability so the algorithm can learn who your ideal users are. Early changes to bids, budgets, or structure reset learning and delay results.
Here are the key things Google Ads needs from you in the first 14 days:
Creative variety across formats: Multiple headlines, images, and videos in different formats help Google test placements across Search, YouTube, Shorts, Play Store, and Display.
Stable budgets and bids: Avoid making changes too early so learning can stabilize instead of constantly resetting.
Clean, trusted tracking: Ensure install, early funnel, and purchase events (with value) fire correctly so Google can identify high-quality users.
Clear and realistic conversion windows: Set windows that are long enough to capture conversions but short enough to keep feedback loops clean.
Simple and consolidated campaign structure: Google needs consolidated data. Fewer campaigns and ad groups keep data concentrated, helping Google learn faster with stronger signals.
The next step is making sure your campaign is structured in a way that actually supports that learning. This is where a minimum viable campaign setup plays a critical role.
How a Minimum Viable Campaign Setup Helps Google Learn Faster
The goal of your first Google Ads UA campaign is not to hack keywords or outsmart the platform. Your goal is to feed Google’s machine-learning system enough data and variety so it can figure out what works. A Minimum Viable Campaign Setup is designed exactly for this, helping Google learn faster without wasting your budget.
Here is how Google can learn faster and drive better acquisition results:
1. Clean Tracking Helps Google Learn What Matters
Google Ads lives and dies by first-party data. Even if you use an MMP like AppsFlyer or Adjust, you must link your Firebase project to Google Ads and import events directly from there. Google trusts its own data more than third-party sources, and campaigns often learn faster and deliver lower CPIs when Firebase events are used.
2. Conversion Windows Control the Speed of Learning
Most teams click “Next” through conversion settings without thinking, but these settings directly control how fast and how accurately Google learns. Conversion windows tell Google how long to wait before counting a conversion after someone interacts with your ad.
If the window is too short, Google doesn’t get enough data, and learning slows down. If it’s too long, Google picks up noisy signals and starts optimizing on misleading data. A realistic conversion window to keep feedback loops clean and learning reliable.
Here’s how to think about the key conversion windows:
Post-install conversion window: This defines how many days after install Google should look for a purchase or key action. Shorter windows create faster feedback and quicker learning, but they cap long-term value. Longer windows capture whale LTV but slow down learning. Google defaults to longer windows, which is fine early on if your goal is scale, as long as you understand the trade-off.
Click-through conversion window: This tells Google whether a user who clicked your ad days ago should still get attributed if they convert today. For most UA teams, keeping this at 30 days works best. Shortening it unnecessarily reduces your audience pool.
Engaged-view conversion window (critical for video): This counts conversions from users who watched at least 10 seconds of your video but didn’t click. Set this to around 3 days. Many users watch a YouTube Short, remember your app or product, and convert later. A 1-day window often misses this behavior, especially for mobile games, subscription apps, and DTC video.
View-through conversion window: This credits conversions when a user sees your ad but doesn’t click or engage. Keep this tight for 1 day. Longer windows inflate results and give Google credit for conversions that would have happened anyway.
When you set conversion windows correctly, you give Google clean feedback loops. That’s what allows the algorithm to learn faster, make better decisions, and set you up for stable performance before you scale.
3. Simple Campaign Structure Speeds Up Learning
Fragmentation is the enemy of learning. If you create too many campaigns, ad groups, or geo splits, you spread your budget too thin and starve Google of data.
A proper setup keeps structure simple and consolidated:
Start with a few core campaigns instead of dozens.
Let Google accumulate signals in one place.
Expand only after learning stabilizes.
Once you have enough data, even a single worldwide campaign can outperform granular setups because it gives Google maximum liquidity.
4. Audience Signals Guide Learning Without Restricting It
Many UA teams assume Google App Campaigns have no targeting, but that’s no longer true. You can now add Audience Signals at the ad group level to guide Google’s algorithm. These signals don’t restrict delivery like Meta targeting; they simply tell Google where to start looking for high-intent users.
The setup is simple:
Go to your Ad Group → Audiences → Edit Audience Segments, and add the following signals:
Competitor search terms (custom segment): Create a custom segment of users searching for your top 5–10 competitors. This is high-intent traffic and gives Google a strong starting point for learning.
Category or genre keywords: Add keywords related to your product, game genre, or core mechanics (for example, “Tower Defense,” “4X Strategy,” or relevant DTC product categories).
Detailed demographics (when relevant): Use demographic exclusions to avoid wasted spend. For example, if your app or game is 18+, exclude younger age groups to prevent learning from low-quality traffic.
These audience signals help Google identify relevant users more quickly without sacrificing scale. In many cases, adding them can meaningfully improve early learning efficiency and performance. By using audience signals correctly, you guide the algorithm faster, making learning faster and more efficient in a Minimum Viable Campaign Setup.
5. Learning Bidding Unlocks Data Faster
Google’s bidding logic now works much more like Meta’s “Highest Value” vs. “Minimum ROAS” approach. In a Minimum Viable Campaign Setup, bidding is not about efficiency on day one; it’s about unlocking volume and data so Google can learn who your best users are.
Phase 1: Cost Per Action: Learn Through Volume
Goal: Get installs and early data.
Setup: Optimize for installs or an early engagement event (e.g., tutorial completion).
Why this matters: At launch, Google has no history. It doesn’t yet know who a payer or high-value user is, so optimizing for value too early slows learning.
How to bid: Start aggressively around 1.5x to 2x your target CPI. This helps unlock delivery and gives Google enough volume to learn.
Phase 2: Maximize Conversion Value (No Target): Find High-Value Users
What changes: You select “In-app action value” but do not set a target ROAS.
What this does: Google spends your full daily budget to generate the maximum revenue, regardless of the ROAS percentage. This is Google’s version of a “Highest Value” strategy.
When to use it: Switch to this phase once you have roughly 50 purchases recorded.
Why it works: Older tROAS campaigns often stopped spending if they couldn’t hit the target. This mode fixes that. It guarantees spend, increases data density, and helps Google identify high-value users and whales.
Phase 3: Maximize Conversion Value + Target ROAS: Add Efficiency
What changes: You now check the box for “Set a target return on ad spend.”
What this does: You tell Google to offer value, but only if you can meet this efficiency level.
When to use it: Only after Phase 2 has stabilized and performance patterns are clear.
Setting a high ROAS target too early (for example, 50% D7 ROAS) will kill delivery. Start by setting the target slightly below your current baseline ROAS, then tighten gradually as performance holds.
6. Asset Density Unlocks Inventory
Google is an “everything” platform. Your ads can show on YouTube, Search, the Play Store, and the Display Network. To access all this inventory, Google needs asset density and enough creative variety to match every placement. If you miss even one major format, you can lose 30% or more of available inventory.
How to Structure Ad Groups for Asset Density
Your ad groups should be organized by creative concept, not random uploads.
Ad group guidelines based on budget:
$250–$1,000/day: Run 3–5 active ad groups.
$1,000+/day: Run 5+ active ad groups.
What Goes Inside Each Ad Group
Each ad group should represent one clear creative angle. This helps Google compare performance and learn what works.
Examples of strong creative-based ad groups:
Group A: Gameplay / Core Loop: Your control group. Shows exactly how the product or game works.
Group B: UGC / TikTok-style creatives: Vertical, native-feeling content designed for YouTube Shorts and short-form placements.
Group C: AI, weird, or “wall of text” creatives: High-CTR hooks that grab attention and test bold messaging.
Group D: Progression or upgrade mechanics: Show growth, rewards, upgrades, or long-term value.
Group E / F: Additional concepts based on your product offers, social proof, pain points, or feature highlights.
The goal is not to find the perfect creative on day one. The goal is to give Google enough structured variety to test across all placements. More assets mean more learning opportunities and faster performance discovery.
7. Scaling Comes After Learning, Not Before
Google Ads is designed for gradual growth, not sudden jumps. If you double the budget overnight, you reset learning, CPAs spike, and performance becomes unstable. To scale safely, use the Hamburger scaling strategy, which emphasizes small, controlled changes rather than aggressive increases.
How the Hamburger Scaling Strategy Works
Each layer of the hamburger represents one controlled adjustment:
Bun (Bottom): Small Budget Increase (10-20%).
Meat: Small Bid Increase (improve competitiveness).
Bun (Middle): Another Budget Increase (10-20%).
Cheese: Creative Refresh (Add new assets to a fresh Ad Group).
Bun (Top): Final Budget Increase.
Make one change at a time, then wait 5–7 days before making the next step. If performance holds, move forward. If it doesn’t, pause and stabilize first. Controlled scaling protects learning and helps you grow user acquisition without breaking performance.
The quality, variety, and structure of your creatives ultimately determine how fast that learning turns into scalable performance.
Creatives That Help Google Learn and Scale Faster
Google’s algorithm learns by testing different assets across Search, YouTube, Shorts, Play Store, and Display. The more structured variety you give it, the faster it understands what works. Your goal is to feed the algorithm enough inputs so learning can happen quickly and at scale.
Always upload at least five different headlines and descriptions per ad group. Google treats these text assets almost like keywords. Refreshing headlines and descriptions regularly is a legit way to unlock more spend and expand reach, without touching bids or budgets.
To unlock full inventory and speed up learning, your creative mix should include:
Headlines and Descriptions (Text): Upload at least 5 variations per ad group. Text assets help Google match your ads to intent across Search and Play Store placements. Updating text is one of the easiest ways to restart learning safely.
Videos (The Main Growth Driver): Video drives most of the volume on Google Ads. You need:
Portrait (9:16): Critical for YouTube Shorts, this is where scale comes from.
Landscape (16:9): Required for traditional YouTube placements.
Bumper ads (6 seconds): Short, punchy videos that work extremely well for reach and early exposure. Don’t ignore them.
Images: Use as many image slots as you can (up to 20). Images support Display placements and video thumbnails. While video usually performs better, images help maintain coverage when video inventory is limited.
HTML5 / Playables (Optional Early, Powerful Later): Playables aren’t required at the MVP stage, but they can become a strong scaling lever later, especially for mobile games. Once Google has learned, playables help unlock high-intent inventory.
In 2026, Google Ads rewards asset density, freshness, and format coverage. The more quality creatives you give the algorithm, the faster it learns, and the easier it becomes to scale user acquisition without breaking performance.
But how do you know which creatives actually worked?
Platforms like Segwise integrate with your Google Ad account to help UA teams understand why certain Google Ads creatives perform better by breaking results down at the creative-element level, so learning doesn’t stop at surface-level metrics. Our tag-level performance optimization can instantly see which creative elements, themes, and formats drive results across all your campaigns and apps. Moreover, Segwise is the only platform that tags playable (interactive) ads.
Even with the right creative mix and learning-focused setup, early mistakes can undo progress quickly. Before you scale or optimize further, it’s just as important to know what actions can slow learning and waste budget.
What NOT to Do in Your First Google Ads UA Campaign
In the early stages, small mistakes can reset learning and waste budget before Google has a chance to understand your users. Avoiding these actions is just as important as setting the campaign up correctly.
Here are the most common mistakes to avoid in your first Google Ads UA campaign:
Don’t start with the “Target ROAS” box checked: On day one, this setting acts as a hard restriction. With no historical data, you’re limiting delivery before Google understands who converts. Start without a ROAS target and add it later once learning stabilizes.
Don’t fight the Display Network: Manually excluding Display or trying to control placements limits reach and blocks low-cost inventory. Let Google explore where it can find conversions efficiently.
Don’t upload only landscape videos: Portrait video is critical for YouTube Shorts. If you don’t have vertical creatives, you miss a large part of the available inventory and slow learning.
Don’t panic during the learning phase: Every bid change, creative swap, or budget adjustment resets learning. If performance looks unstable early on, resist the urge to intervene. Sit on your hands and let the campaign stabilize.
Once you’ve avoided the common early mistakes, the next step is knowing how to evaluate your Google ad campaign.
Also Read: How AI Is Revolutionizing Mobile User Acquisition in 2025
How to Evaluate Your First Google Ads UA Campaign
The first two weeks of your Google Ads UA campaign should be treated as a learning phase, not a performance judgment. Your goal is to understand whether the campaign is learning correctly, not to optimize too early.
This framework helps you know when to check performance, what to look for, and when to make a decision:
1. Days 1-5: Let the Campaign Learn
In the first few days, Google is exploring placements and audiences. CPIs will fluctuate, and ROAS won’t be meaningful yet.
During this phase:
Make sure the campaign is spending.
Confirm install and post-install events are firing.
Focus on creating and uploading new creatives.
Avoid changing bids, budgets, or structure. Early changes reset learning and slow progress.
2. Day 7: Run a Sanity Check
Around Day 7, do a basic health check, nothing more.
Ask yourself:
Is spending consistent?
Is CPI within a reasonable range?
Are conversion events firing correctly?
If the answers are yes, close the dashboard and wait. If not, fix delivery or tracking issues, but don’t optimize for efficiency yet.
3. Day 14: Make a Clear Decision
By Day 14, Google has enough data to show a real trend.
This is where you decide:
Performance is improving: keep the campaign running and start light optimization
Performance is clearly broken: pause, adjust creatives or structure, and relaunch. Avoid small reactive changes. Either continue learning or reset properly.
This approach prevents early panic, avoids constant learning resets, and forces decisions based on trends rather than noise. When you evaluate your first Google Ads UA campaign this way, scaling becomes less risky.
Conclusion
Launching your first Google Ads UA campaign doesn’t have to feel risky or chaotic. Early success on Google isn’t about complex structures or aggressive optimization; it’s about learning first. By using a Minimum Viable Campaign Setup, you give Google what it needs: clean signals, creative variety, stable inputs, and time to learn. When learning is protected early, optimization and scaling become far more predictable and far less expensive.
As you move from launch to scale, creative visibility becomes just as important as setup. This is where Segwise fits naturally into your Google Ads UA workflow.
Segwise integrates directly with your Google Ads campaigns and pulls creative-level data to show you why a specific ad is driving results. To set it up, go to the Segwise Dashboard → Settings → Ad Networks, click Connect under Google Ads, sign in, and select your Google Ads account. That’s it! Segwise automatically analyzes your Google ad creatives.
Our tag-level creative element mapping tells you that specific creative elements drive performance. You can discover patterns like "this hook appears in 80% of top-performing creatives". Moreover, multi-modal AI tagging automatically identifies and tags creative elements like hook dialogs, characters, colors, and audio components across images, videos, text, and playable ads to reveal their impact on performance metrics like IPM, CTR, and ROAS. Segwise is the only platform that tags playable (interactive) ads.
With fatigue tracking, you can catch a performance drop before it impacts your budget allocation and campaign results. So your Google Ads campaigns stay efficient, stable, and scalable without wasting budget.
So, why wait? Start your free trial today and turn Google ad creatives data into clear, actionable insights!